Classification - adding, running and deleting projects
Adding a new project
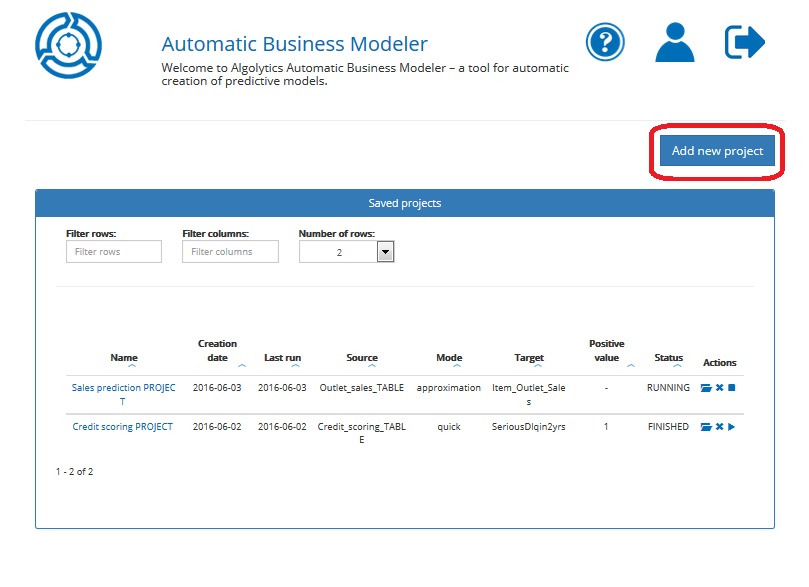
In order to create a new project, go to the Homepage and click the Add new project button.
In the next five steps you will be asked to:
Step 1: Enter the name for your project and select a problem category
Step 2: Select a source dataset
Step 3: Enter variables settings
Step 4: Enter building model process settings
Step 5: Check if the information provided is correct
In the next chapters, you will learn how to specify the settings of your projects with reference to the above steps.
Step 1: Naming a new project and selecting a problem category
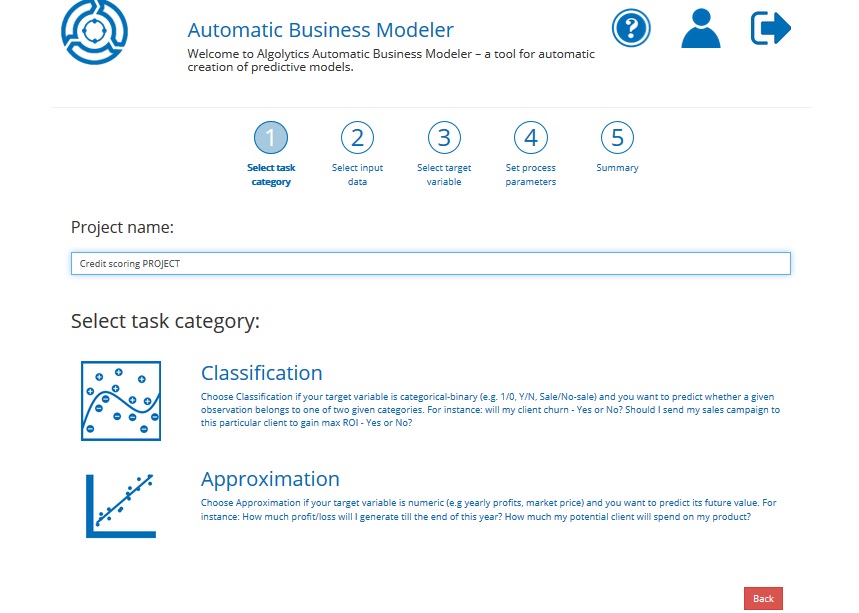
In the first field, enter a project name (something easy to remember).
Remark: The project name should be no longer than 32 characters
Click Classification in order to proceed to the next step.
Step 2: Selecting a source dataset
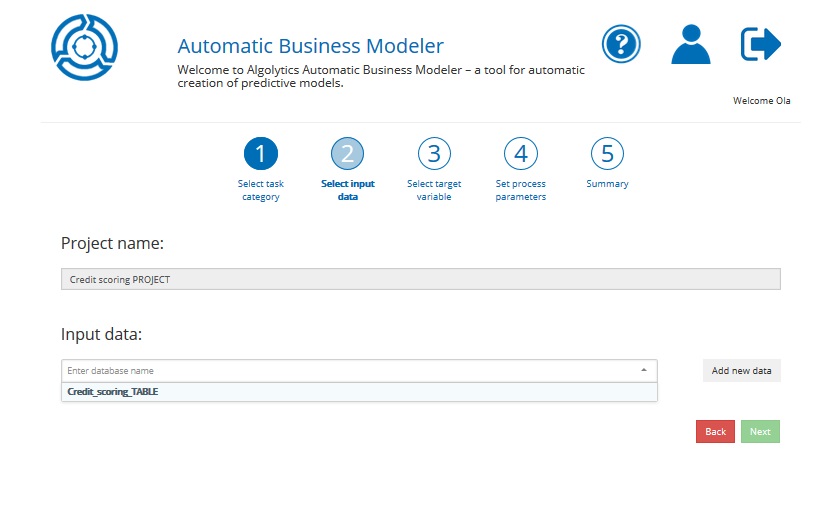
Indicate the dataset that will be used to build your model. You can do this by choosing already imported files from the list. If there is no data available or you want to import new data, click the Add new data button and follow the steps described in the Chapter Importing files.
Click the Next button to proceed.
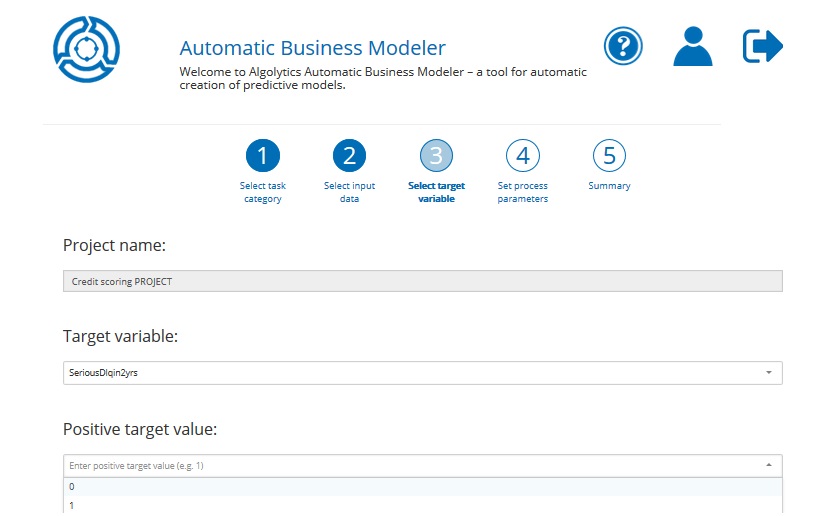
Step 3: Entering variables settings
In this step you will be asked to:
- Choose a target variable (e.g. TARGET) and define what is a positive value of the target variable (e.g.: 1)
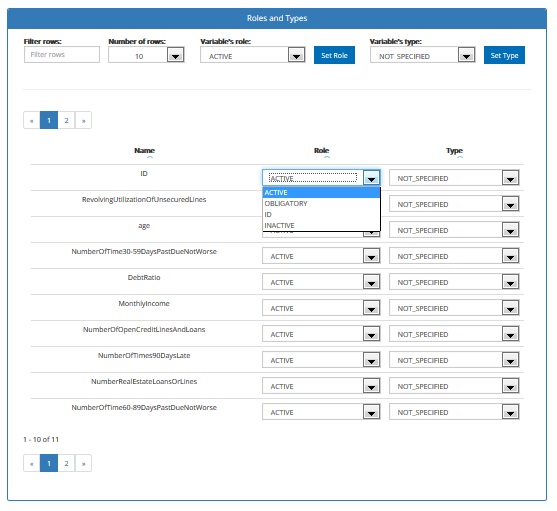
- (optional) you can impose how ABM ought to use selected variables by indicating their type (ACTIVE, INACTIVE, OBLIGATORY, ID) and/or role (CATEGORICAL, NUMERICAL)
Here is a short description of what particular types and roles mean:
- ACTIVE: if a variable is active, it means that it will be taken into account during the model building process (but it doesn’t mean it will be selected for the model)
- INACTIVE: if a variable is inactive, it means that it will be ignored during the model building process
- OBLIGATORY: if a variable is obligatory, it means that it will be chosen during the feature selection stage, but not necessarily included in the final model
- ID: ID variable is a variable with unique values used for identification of observations (e.g. customer ID). In the scoring process, scoring points will be assigned to the ID variable
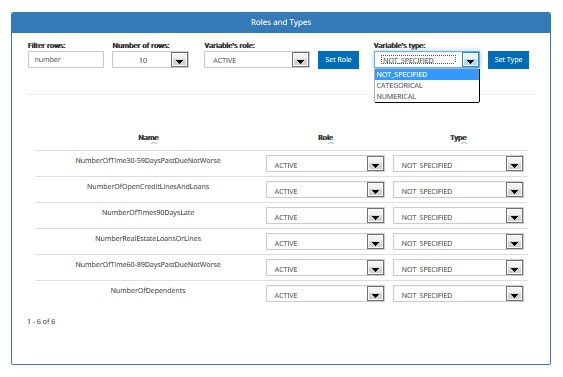
- CATEGORICAL: is a variable that takes a value that is one of several possible categories (e.g. gender, occupation, eye colour). Categorical variables have no numerical meaning
- NUMERICAL: is a variable naturally measured as a number (e.g. age, income, temperature) for which an arithmetic operation can be applied
In order to assign a specific type and/or role to selected variable(s):
- Filter rows, to see only selected variable(s)
- Choose from the list role and/or type that a single variable(s) should have
If you want to set a specific type/role to multiple variables:
- Filter rows, to see only selected variables
- Choose from the list role and/or type that selected variables should have
- Click Set Role and/or click Set Type button to make changes
Click the Next button if you want to proceed or the Back button if you want to change the previous project settings.
Step 4: Building model process settings
In this step, you will be asked to enter various settings that specify the modelling process.
Working mode: there are three Working modes available:
- The Quick mode enables obtaining an accurate model in a relatively short time. It automatically ensures the imputation of missing values, choosing the most significant modeling variables and application of optimal variable transformations
- The Advanced mode is an extension of the Quick mode. It uses more advanced methods for feature selection and data preparation (discretization techniques, binarization of categorical variables, imputation of missing values and identification of outliers)
- The Gold mode is an extension of the Advanced mode with a more in depth search thorough possible predictive modeling paths. It requires more time for the modeling process and also more time for scoring as the final result is provided as models’ assembly

- Classification model quality measure: the user can select the best way of measuring model quality (default: LIFT)
- LIFT: lift is a measure of the effectiveness of a classification model calculated as the ratio between the results obtained with and without the model. Lift shows how much more likely we are to receive positive target value when using a model than if we select a random sample
- ACCURACY: the proportion of the total number of predictions that were correct
- CAPTURED RESPONSE: the percentage of positive cases for the given percentage of all cases sorted by decreasing score
- PRECISION: the proportion of positive cases that were correctly identified
- RECALL: the proportion of actual positive cases which are correctly identified

- Quality measure cut-off: when LIFT or CAPTURED_RESPONSE is selected as Classification model quality measure the user enters the cut-off value for the selected measure (the percentile at which ABM will optimise the model) (default: 0.1)

Classification threshold: the user can determine how ABM should select a classification threshold value. Classification threshold is a probability above which an observation is classified as the positive target by the model; probabilities returned by the model which are below this value will mean that observation is classified as the negative target (default: 0.5)
- There are 3 options to choose from:
- MANUAL: a classification threshold value is entered by the user
- AUTOMATIC: a classification threshold value is automatically determined by ABM. It is active when the Classification model quality measure is set to LIFT or CAPTURED_RESPONSE. The threshold corresponds to the Quality measure cut-off (e.g. if the cut-off is 0.1 then the Classification threshold value will be automatically chosen to classify 10% of the population as positive)
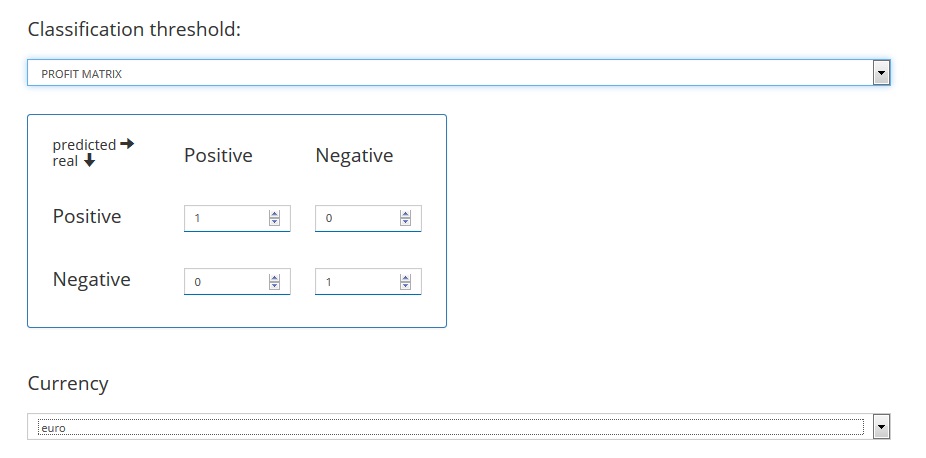
- PROFIT_MATRIX: a classification threshold value is determined based on the specified Profit matrix

5. Classification threshold value (PROFIT MATRIX): the Profit matrix enables the user to specify profit or costs associated with correct or incorrect classification decisions. It is possible to assign profit and cost values to each combination of real and predicted response categories. By default both the profit of classifying a positive target value as positive and classifying a negative target value as negative are set to 1. The other profits are set to 0. Negative values should be used to specify costs.
- (advanced settings) Sampling mode: determines the sample selection method during the data sampling stage. The following modes are available (default: MANUAL):
- MANUAL: the user sets the sample size manually
- AUTO_ADVANCED: sample size is selected automatically

- (advanced settings) Sample size: in conjunction with MANUAL Sampling mode, the user enters the sample size in this field. The default setting is 30 000

- (advanced settings) Stratification mode: ABM supports the use of stratified sampling. This is especially useful when the proportion of the positive target values is small within the data set. The user can determine the ABM behaviour in case it is not possible to ensure both the specified sample size (user specified: Sample size) and the proportion of positive target values (user specified: Positive target category ratio). The following modes are available (default: CONST_NUM):
- CONST_RATIO: ABM will preserve the proportion of the positive target if there are not enough positive target values in the data set, the resulting sample size will be smaller than specified
- CONST_NUM: ABM will preserve the sample size if there are not enough positive target values in the data set, its proportion in the resulting sample will be smaller
- NONE: stratified sampling is turned off, the original proportion of the positive target will be preserved
- OVERSAMPLING: when there are not enough positive target values in the data set, positive target samples will be drawn multiple times in order to maintain the proportion of the positive target in the sample as well as the sample size itself

- (advanced settings) Positive target category ratio: stratified sampling setting which specifies the proportion of the positive target in the resulting sample; if Stratification mode is set as NONE, this option is ignored (default: 0.5)

Click the Next button if you want to proceed or the Back button if you want to change the previous project settings.
Step 5: Summary
You are almost ready to build a predictive model with ABM. In this final step, check whether all information provided in Steps 1,2,3,4 is correct.
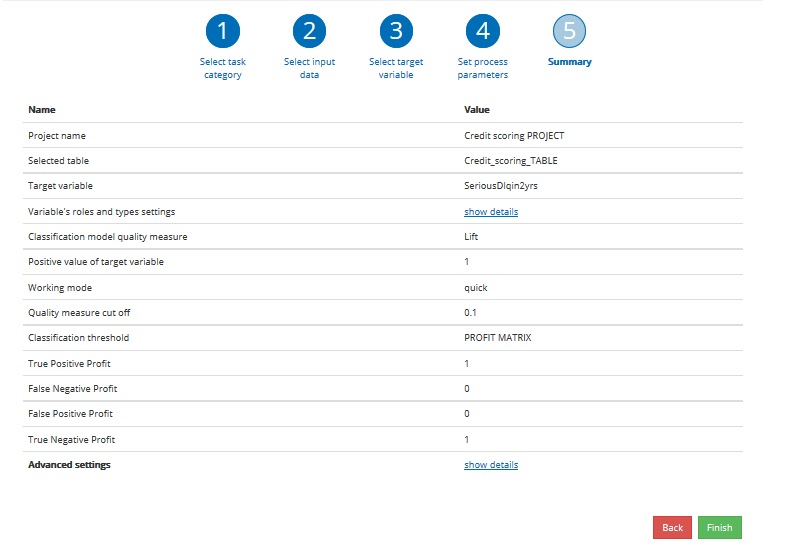
If you have no remarks, click the Finish button. If not, click the Back button to make changes.
Running a project
After setting project parameters and clicking the Finish button you will be sent to a webpage where you can run the project. Just click the Run button.
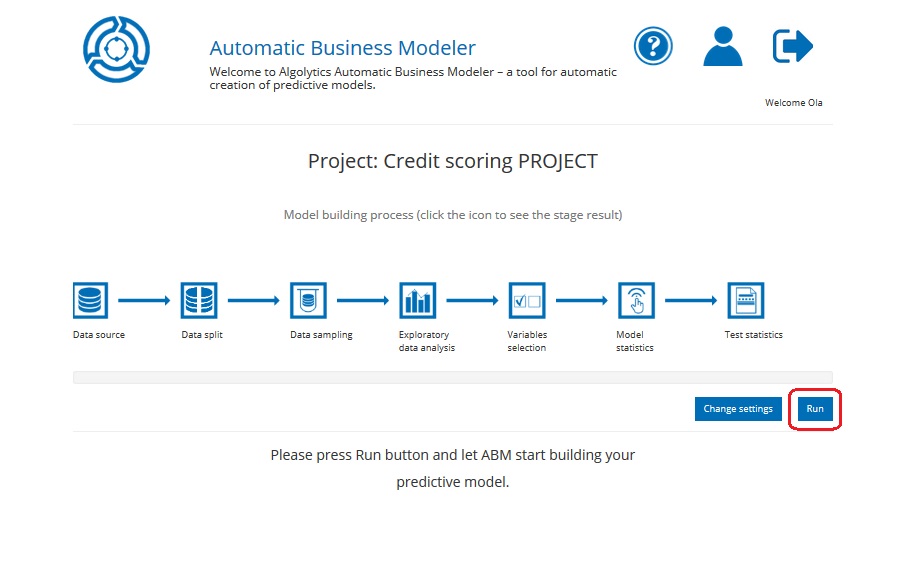
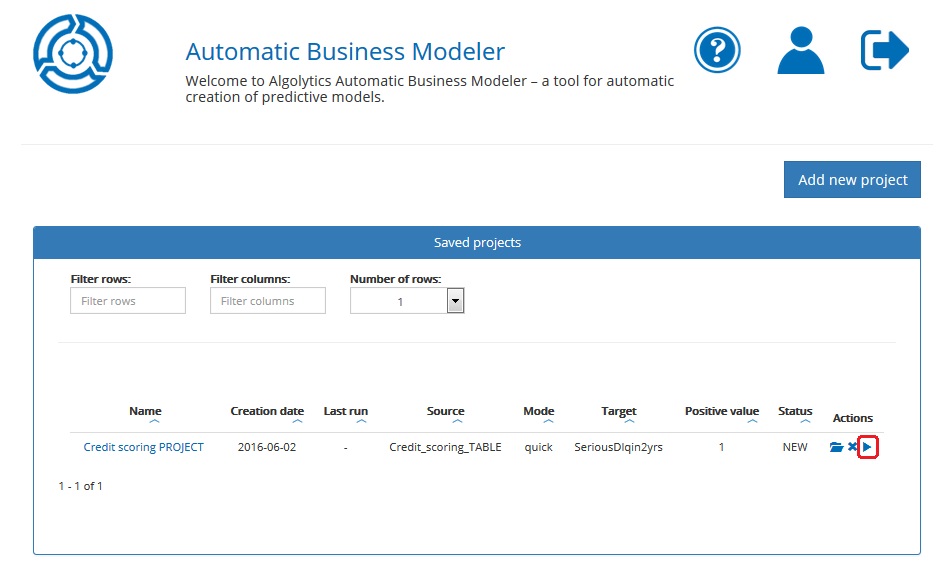
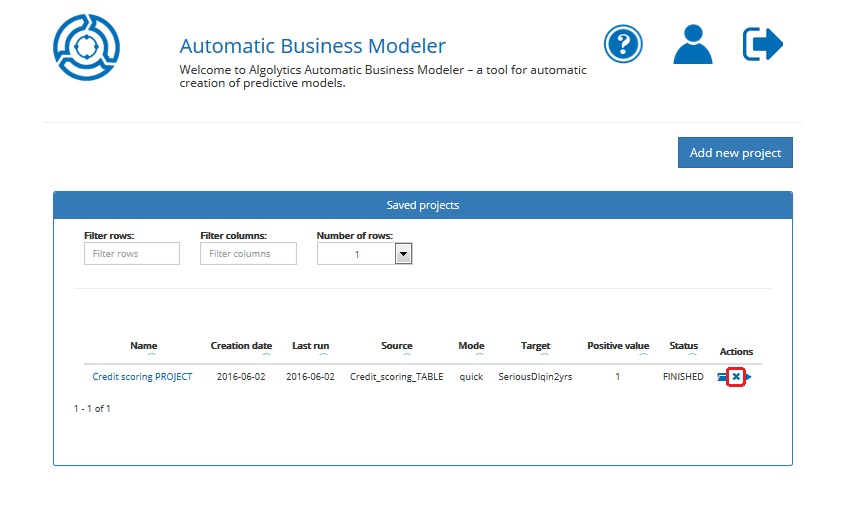
You can also run a project from the Homepage by clicking the Run project button.
The model building process may take a while depending on the working mode (Quick, Advance, Gold) you have chosen. Gold mode takes the longest. So it’s time to grab a cup of coffee and wait until it finishes :)
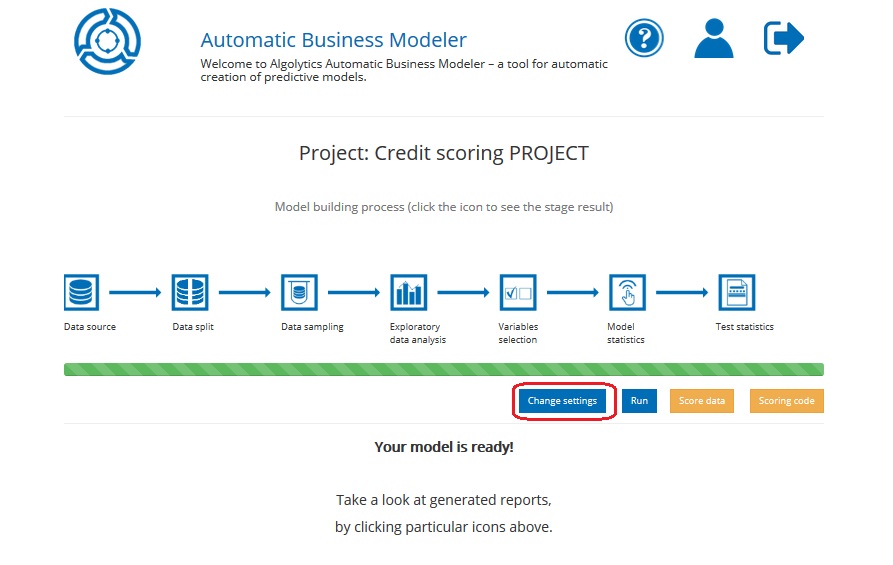
Nevertheless, you can explore the report concerning the particular process stage as soon as ABM finishes calculating its statistics. Open the project by clicking on its name and then click the icon to see the stage result.
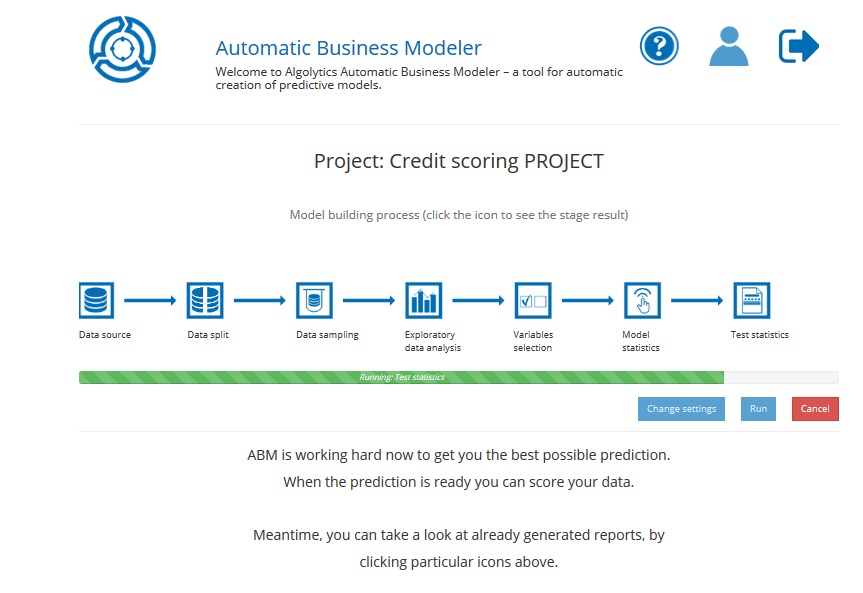
You can monitor the progress of calculating the model thanks to the progress bar available after opening the project.
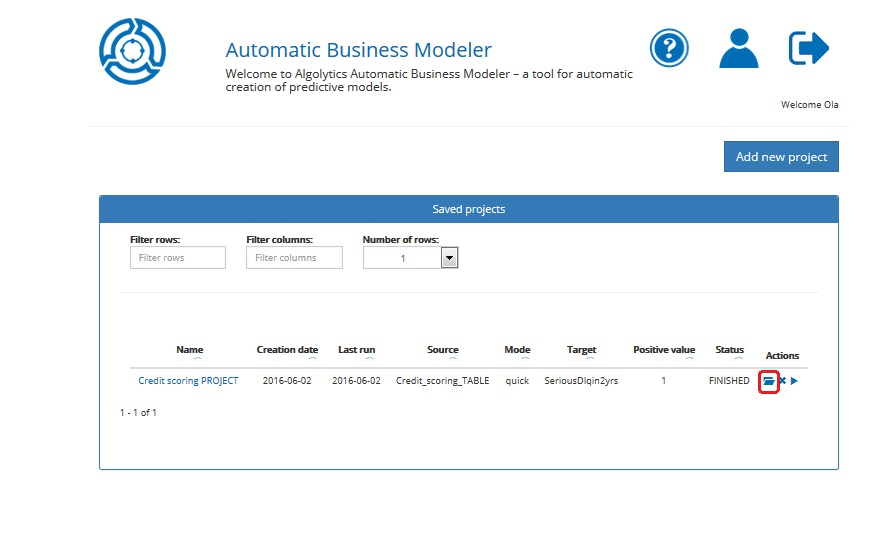
After your predictive model is built, you can score a new data or download a scoring code.
Remarks If you wanted to re-run your project, source data should be available in the Repository (Files imported to Repository). Otherwise the project is in the read-only status. You can explore its reports and score data but can’t run it.
Changing project settings
Sometimes you may come to the conclusion that the settings of the project you have just added are not right and you wish to change them. You can do this before running the process:
- From the Homepage, click the Open project button or click the project name
- Click the Change settings button and follow Steps 1,2,3,4,5 described in previous chapters
Remark: You can also change settings after the model is built to check how it performs with other parameters. However, to avoid overwriting already received results, we suggest adding another project with new parameters and comparing the models built within both projects.
Deleting a project
In order to delete a project, click the Delete button available from the Homepage.
You will be asked for confirmation.
