Repository
Introduction to working with data in ABM
In the ABM Repository, you can store all the files you want to use in your projects and files with scoring results (generated automatically by ABM).
All files for modelling and scoring need to be uploaded from your computer to the ABM server. They are transferred securely using SSL protocol and stored in the Amazon Elastic Compute Cloud. The current ABM release allows you to upload .csv files (other formats are planned).
If you want to use a particular file for modelling you also need to import it from server to ABM internal database. From then on, the imported data becomes one of the tables (with the name given to it by you) in the ABM database. This will make all the tasks performed on this data more efficient. You will be able to use this particular table in other projects, too.
To access the Repository, choose the Repository icon from the left menu. There are three bookmarks available.

You can execute the following actions:
- Uploaded files
- Open: in order to open a selected file, click its name
- Import: in order to import data to ABM’s database, click the Import icon
- Delete: in order to delete a selected file, click the Delete icon
- Files imported to database
- Delete: in order to delete a selected dataset, click the Delete icon
- Scoring results
- Open: in order to open a selected file, click its name or the Open project icon
- Delete: in order to delete a selected file, click the Delete icon
Uploading files
Before you start to build your predictive models, you need to upload a file with the source dataset:
- Go to Repository by clicking the Repository icon from the left menu and choose the Uploaded files bookmark
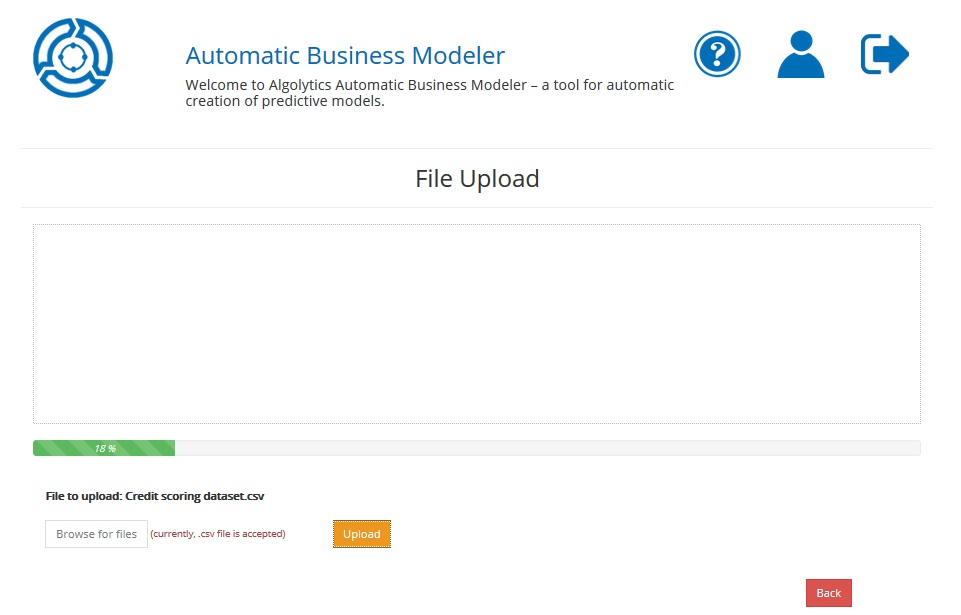
- Click the Upload button
- Click the Browse for files button and select the target file from your computer
- Upload the file with the Upload button
- After selecting your file, wait until it’s uploaded
It is also possible to upload a file during the first step of the adding a new project process or during the importing files process. In both cases, follow steps 3-4 described above.
Importing files
You can import a file to the ABM internal database in two ways: from the Repository level or while adding a new project.
Importing files from Repository
- Go to Repository by clicking the Repository icon from the side menu and choose the Files imported to database
- Click the Import button and follow Steps 1,2,3,4 described below
Importing files while adding new project
- It is also possible to import files to the ABM internal database during the first step of adding new project. Click the Add new data button and follow Steps 1,2,3,4 described below
The importing files process is divided into four steps:
Step 1: Choose uploaded .csv file
Step 2: Enter import settings
Step 3: Name the table in the ABM database
Step 4: Check if the information provided is correct
Step 1: Choosing a file for import
- Select a previously uploaded file from the list (or if it’s not on the list, upload it now):
- Click Browse for files button and select the source file from your computer
- Upload the file with the Upload button
- After selecting your file, wait until it’s uploaded
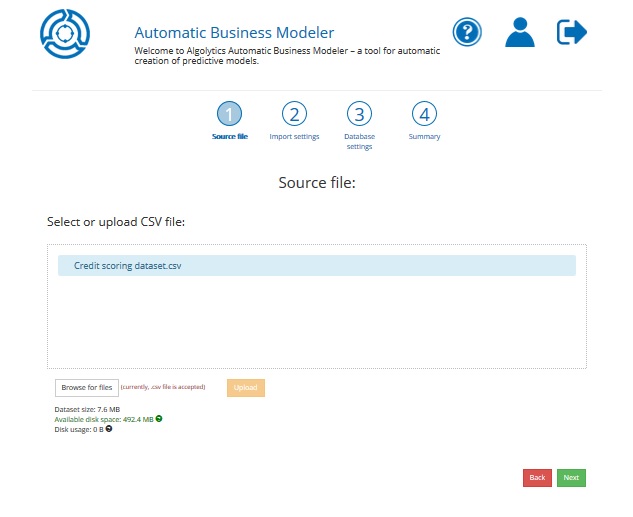
Choose the Next button.
Step 2: Entering file settings
- Columns separators. For instance, if columns in CSV file are separated by a comma (e.g. name, email, age), write , in the first field
- Decimal separators. For instance, if a decimal character is a dot (e.g. 4.25) in CSV file, then write . in the second field
- Text separators. For instance, if a quotation mark is used to indicate the beginning and end of the text (e.g.’Baker Street 221b’), write ‘ in the third field
- File encoding. Choose the character encoding used in your file. If you need to add specific encoding to the list, contact us at abm_support@algolytics.com
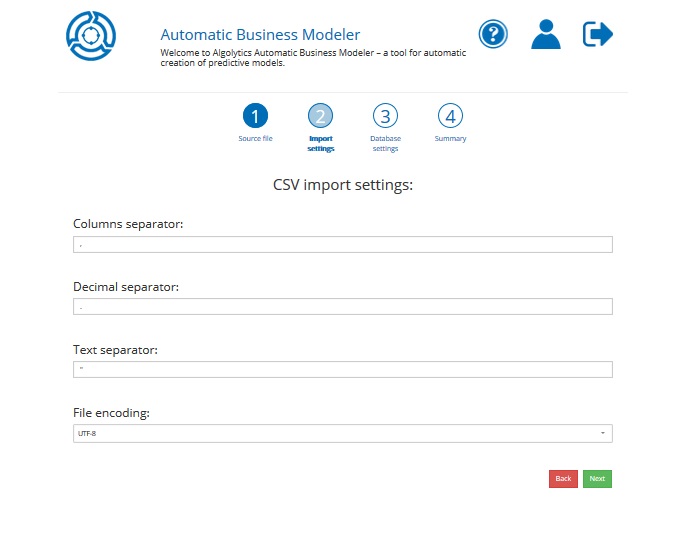
Then choose the Next button to proceed or the Back button if you want to change the previous settings.
Step 3: Naming the table with source data
Enter a name for the table in the ABM database where your source data will be stored. The table name should include only letters (a-z, A-Z), numbers (0-9), dashes (-), underscores (_).
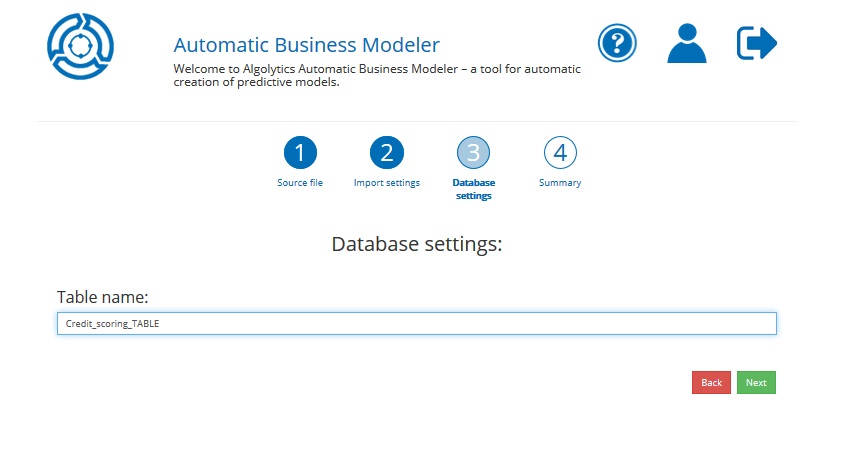
Then choose the Next button to proceed or the Back button if you want to change the previous settings.
Step 4: Summary
The last thing you have to do is to check the correctness of the information shown in the Summary.
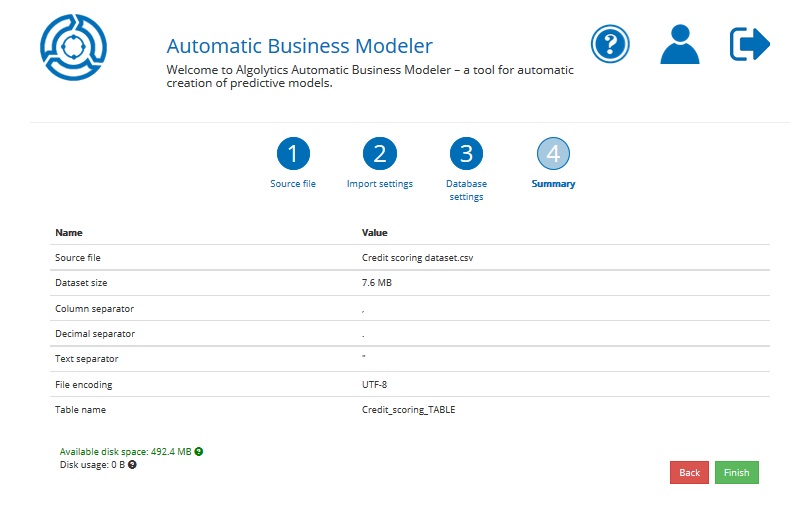
Then choose the Finish button or the Back button if you want to change the previous settings.
Now you are ready to add new project! Go to Homepage and click the Add new project button.